
· 2 min read
Josh Twist

We're working on adding support for Firebase auth to Zuplo (as we did with Supabase) and in doing so came across their JWT signing approach which is one of the more unusual. They sign their tokens with certs and they publish these certs at a well-known URL: https://www.googleapis.com/service_accounts/v1/metadata/x509/securetoken@system.gserviceaccount.com.

It took us a while to work out how to validate these JWT tokens using our preferred library: Jose.

Hopefully this will save you some time if you're trying to do the same thing. Note that we cache the certs in memory since they do not change often (hopefully!).

let publicKeys: any;

const getPublicKeys = async () => {
if (publicKeys) {
return publicKeys;
}
const res = await fetch(
`https://www.googleapis.com/service_accounts/v1/metadata/x509/securetoken@system.gserviceaccount.com`
);
publicKeys = await res.json();
return publicKeys;
};

// This goes
// inside your auth function or middleware

const authHeader = request.headers.get("authorization");
const token = authHeader.substring("bearer ".length);

const firebaseProjectId = "your-project-id";

const verifyFirebaseJwt = async (firebaseJwt) => {
const publicKeys = await getPublicKeys();
const decodedToken = await jwtVerify(
firebaseJwt,
async (header, _alg) => {
const x509Cert = publicKeys[header.kid];
const publicKey = await importX509(x509Cert, "RS256");
return publicKey;
},
{
issuer: `https://securetoken.google.com/${firebaseProjectId}`,
audience: firebaseProjectId,
algorithms: ["RS256"],
}
);
return decodedToken.payload;
};

try {
// This will throw an error if the token is invalid
const tokenData = await verifyFirebaseJwt(token);
console.log(`We got a valid token`, tokenData);
} catch (err) {
console.error(`Invalid Token`, err);
}

Hope you find that useful. Of course, you could always sign up for a free Zuplo account at portal.zuplo.com and get Firebase JWT auth as easy as configuring a policy 👏 👏 👏

· 3 min read
Josh Twist

If you have used React in the last few years you can't have avoided the useEffect react hook. It's the Batman to your Robin, the Han Solo to your Chewbacca, of the React world.

If you're unfamiliar, the useEffect hook in React is used to handle side-effects in functional components. It allows developers to perform operations such as fetching data from APIs, subscribing to events, and setting up timers. The hook runs after every render or change to dependent property, and provides a way to manage stateful logic in a relatively declarative way.

And therein lies the terror - a dependent property. It's all too easy to create a loop in React, where your useEffect causes a chain of changes that updates the dependent property which triggers your useEffect call, which causes a chain of changes that updates the dependent property which triggers your useEffect call, which causes a chain of changes that updates teh dep... you get the idea.

Here's a simple example

import React, { useState, useEffect } from "react";

function ExampleComponent() {
const [data, setData] = useState([]);

useEffect(() => {
fetch("/api/data")
.then((response) => response.json())
.then((result) => setData(result))
.catch((error) => console.log(error));
}, [data]);

return (
<div>
<ul>
{data.map((item) => (
<li key={item.id}>{item.name}</li>
))}
</ul>
</div>
);
}

export default ExampleComponent;

Note that the useEffect call declares a dependency on data but also updates that variable with setData. In most cases, these bugs are not so easy to spot and the loop is hidden by many different calls and a cascade of changes making it much harder to debug.

And notice, in this example we are invoking an API at /api/data. We just made a distributed DDoS machine. If you're lucky, this condition will always happen like in the sample above and you'll notice it immediately. If, as happened to me recently, the loop only happens when the app is in a very specific state nested in a bunch of if statements, it might make it to production. At that point, it only takes a small percentage of your user base to experience this bug for you to bring down a full DDoS on your API.

The reality is that you rarely need rate-limiting to protect from your enemies. It's nearly always your partners or in-house development team that will accidentally take your backend down. Unfortunately the nature of React and useEffect makes this more likely.

The good news is it's easy to protect yourself. You can help prevent performance degradation, reduce costs, and improve the overall user experience of your application by implementing a rate-limiting on your API. You can use an open source package like express-rate-limit or use a SaaS service like Zuplo which is fully-managed, multi-cloud and distributed (over 200 data centers worldwide) - see how to get started with rate-limiting using zuplo - you can start for free.

· One min read
Josh Twist

UPDATE See this post for a detailed walkthrough Shipping a ChatGPT plugin in record time

OpenAI recently announced Chat Plugins for Chat GPT.

To make a plugin you just need an API with an accompanying OpenAPI definition that the Chat GPT. The plugin engine is especially impressive - don't take my word for it; here's Mitchell Hashimoto, Founder of HashiCorp:

Tweet from Mitchell Hashimoto

See tweet here

If you already have an API and are excited to make it into a Chat GPT plugin there's a few things you'll need to do

  • Authentication - support auth with an API Key or OAuth2 client-id and secret.
  • OpenAPI - offer an OpenAPI definition so GPT can understand your API
  • Rate-limiting - add rate-limiting to your API (with retry-after) so OpenAI don't over-consume your resources

Fortunately, Zuplo is here to help. Zuplo is an API Gateway that natively supports OpenAPI (you can generate it using our route designer or import your own). What's more we make it easy to support API key authentication and rate-limiting, making it the fastest and easiest way for you to surface your plugin to OpenAI.

Get started for free, sign-up at https://portal.zuplo.com.

· 2 min read
Nate Totten

In light of some recent news about Docker deleting organizations and the containers that are registered with those organizations I figured I would share how we manage our Docker Containers. Zuplo uses a simple Github Action that runs on a cron schedule that mirrors containers we depend on. We initially built this because we experienced some downtime with Docker Hub that caused interruptions to our deployments. The other reason we mirror images is to keep them close to where we use them - in our case that means GCP Artifact Registry.

The Github Action is fairly simple (see below). This has worked well for us and has removed our dependency on Docker Hub for day to day deployments.

name: Mirror Docker Images
on:
workflow_dispatch:
schedule:
- cron: "0 1 * * *"

jobs:
release:
name: Mirror Images
runs-on: ubuntu-latest

permissions:
contents: "read"
id-token: "write"

env:
PROJECT_ID: my-project
REPO_NAME: docker-registry

strategy:
fail-fast: false
matrix:
image:
- "ubuntu:latest"
- "node:18-alpine3.16"

steps:
- uses: actions/checkout@v3

# Uses workload federation: https://github.com/google-github-actions/auth#setting-up-workload-identity-federation
- id: "auth-gcp"
name: "Authenticate to Google Cloud"
uses: "google-github-actions/auth@v1"
with:
token_format: "access_token"
workload_identity_provider: "your-provider"
service_account: "your-service-account"
access_token_lifetime: "300s"

- name: Set up Cloud SDK
uses: google-github-actions/setup-gcloud@v1.1.0
with:
project_id: ${{ env.PROJECT_ID }}

- name: Authenticate Docker
run: gcloud auth configure-docker us-docker.pkg.dev

- name: Pull Image from Docker Hub
run: docker pull ${{ matrix.image }}

- name: Tag Image
run: docker tag ${{ matrix.image }} us-docker.pkg.dev/${{ env.PROJECT_ID }}/${{ env.REPO_NAME }}/${{ matrix.image }}

- name: Push Image
run: docker push us-docker.pkg.dev/${{ env.PROJECT_ID }}/${{ env.REPO_NAME }}/${{ matrix.image }}

· 2 min read
Josh Twist

Welcome to OpenAPI week at Zuplo!

Zuplo <3 OpenAPI

Today we're announcing our official support for OpenAPI. Unlike other gateways, we're not simply adding an import feature for OpenAPI but are now OpenAPI native, with the format being the core of how route configuration is specified in the gateway.

Any valid OpenAPI document is a valid API Gateway configuration for Zuplo, additional properties and configuration is added via x-zuplo vendor extensions.

As a result, Zuplo now offers the most seamless workflow for API design-first teams and users of OpenAPI. For those that don't, not to worry, you'll be using OpenAPI in Zuplo but won't even notice.

Check out the demo video

Read more about this in our OpenAPI docs.

To celebrate, we're hosting an OpenAPI week with an interviews with special guests from the OpenAPI community. Sign up for the premiere of each chat below:

Darrel Miller
Darrel Miller
Editor of the OpenAPI specification and API architect at Microsoft.
On Tuesday, 3/7, we discuss the Future of OpenAPI (and some history)
Watch Darrel Miller's session here
Phil Sturgeon
Phil Sturgeon
Staff Author and co-host of APIs you won't hate
On Wednesday 3/8, we discuss living with OpenAPI in the real world
Watch Phil Sturgeon's session here
Kevin Swiber
Kevin Swiber
Marketing Chair, OpenAPI
On Thursday, 3/9 we talk about the spec wars and how OpenAPI plays a role in the API lifecycle
Watch Kevin Swiber's session here
Erik Wilde
Erik Wilde
Author, RFC 7807
On Friday 3/10 we'll look at the new(ish) Problem Details for HTTP APIs specification with one of its authors
Watch Erik Wilde's session here

These conversations will be premiering on our YouTube channel. Subscribe for notifications, follow us on Twitter or our Discord to get notified when these great conversations drop.

· 5 min read
Josh Twist

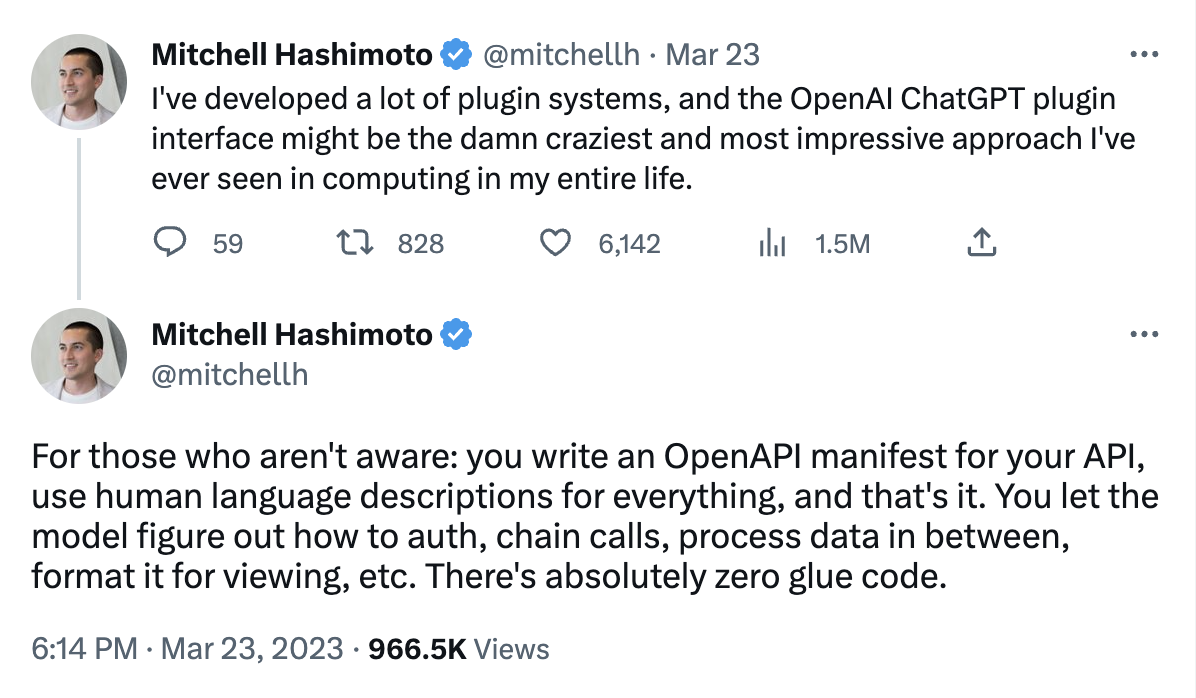
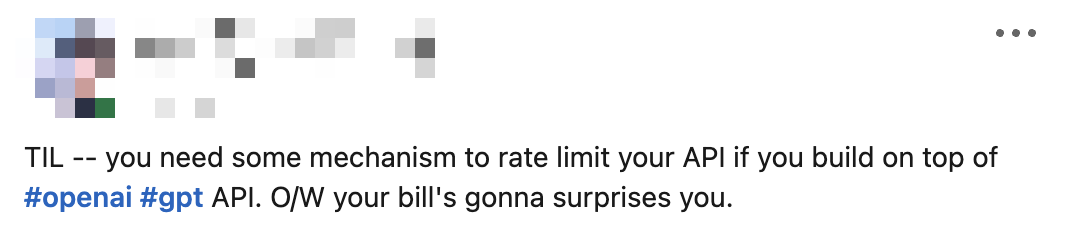
OpenAI is all the rage now and developers are rushing to leverage this technology in their apps and SaaS products. But such is the demand for this stuff, you might need to think about how you protect yourself from abuse - here's a post from a colleague I saw on LinkedIn recently:

LinkedIn comment

You can use a Zuplo gateway to store your API keys and enforce a number of layers of protection to discourage abuse of your OpenAI API keys.

How it works

Zuplo Gateway for OpenAI

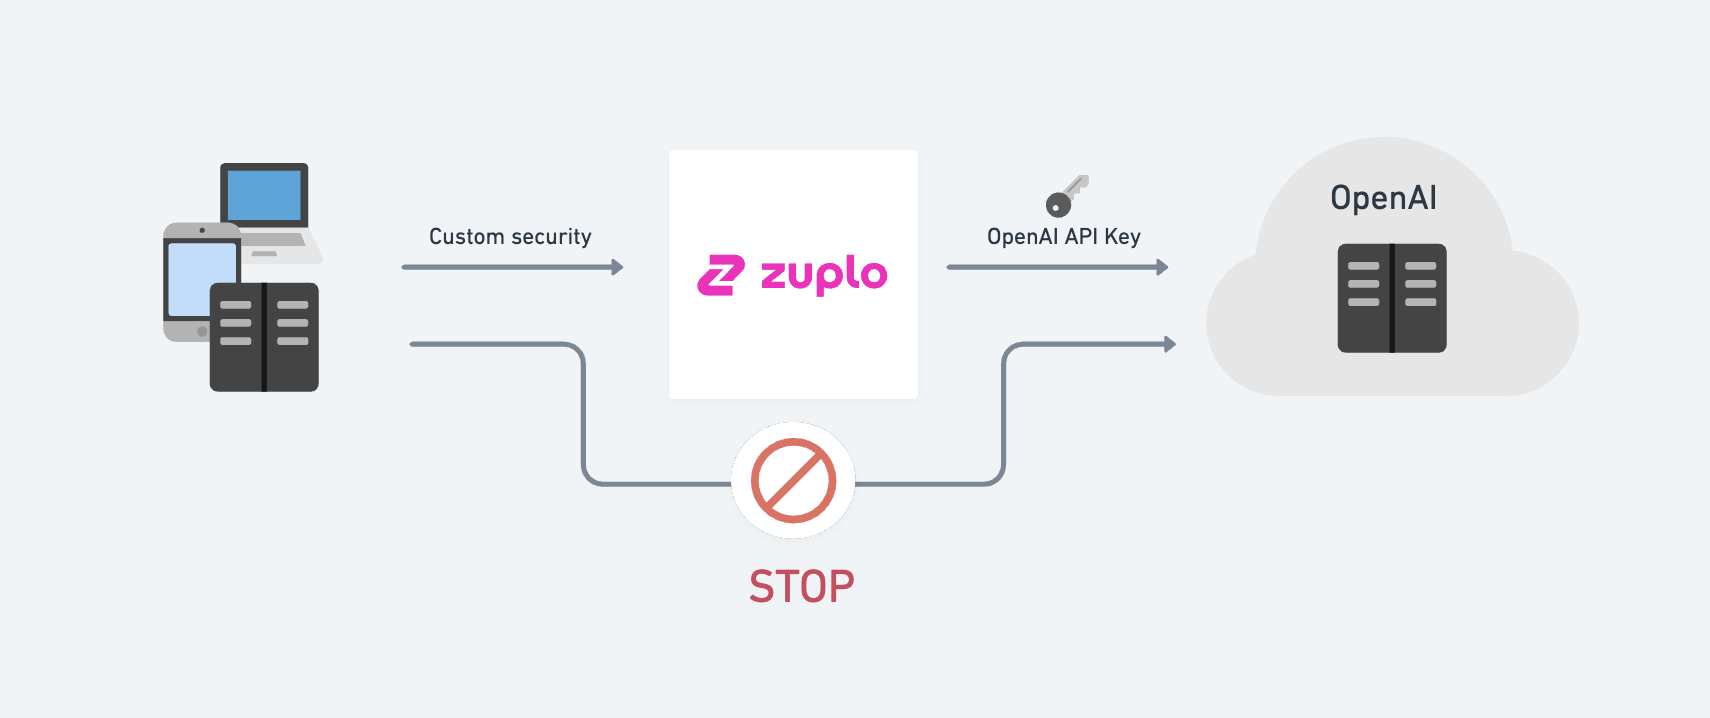
Zuplo allows you to easily perform authentication translation, that is, change the authentication method your clients use. For example you might require your clients to use

  • JWT tokens
  • API Keys issued to each of your customers (different to your OpenAI key, so you can identify each individual customer)
  • Anonymously in a web browser — but ensure the call is coming from the right origin, enforce CORS and rate-limit by IP etc.

Setting up Zuplo to send the API Key

This is a CURL command to call the OpenAI API directly, note the need for an API KEY

curl https://api.openai.com/v1/completions \
-H 'Content-Type: application/json' \
-H 'Authorization: Bearer YOUR_API_KEY_HERE' \
-d '{
"model": "babbage",
"prompt": "Say this is a test",
"max_tokens": 7,
"temperature": 0
}'

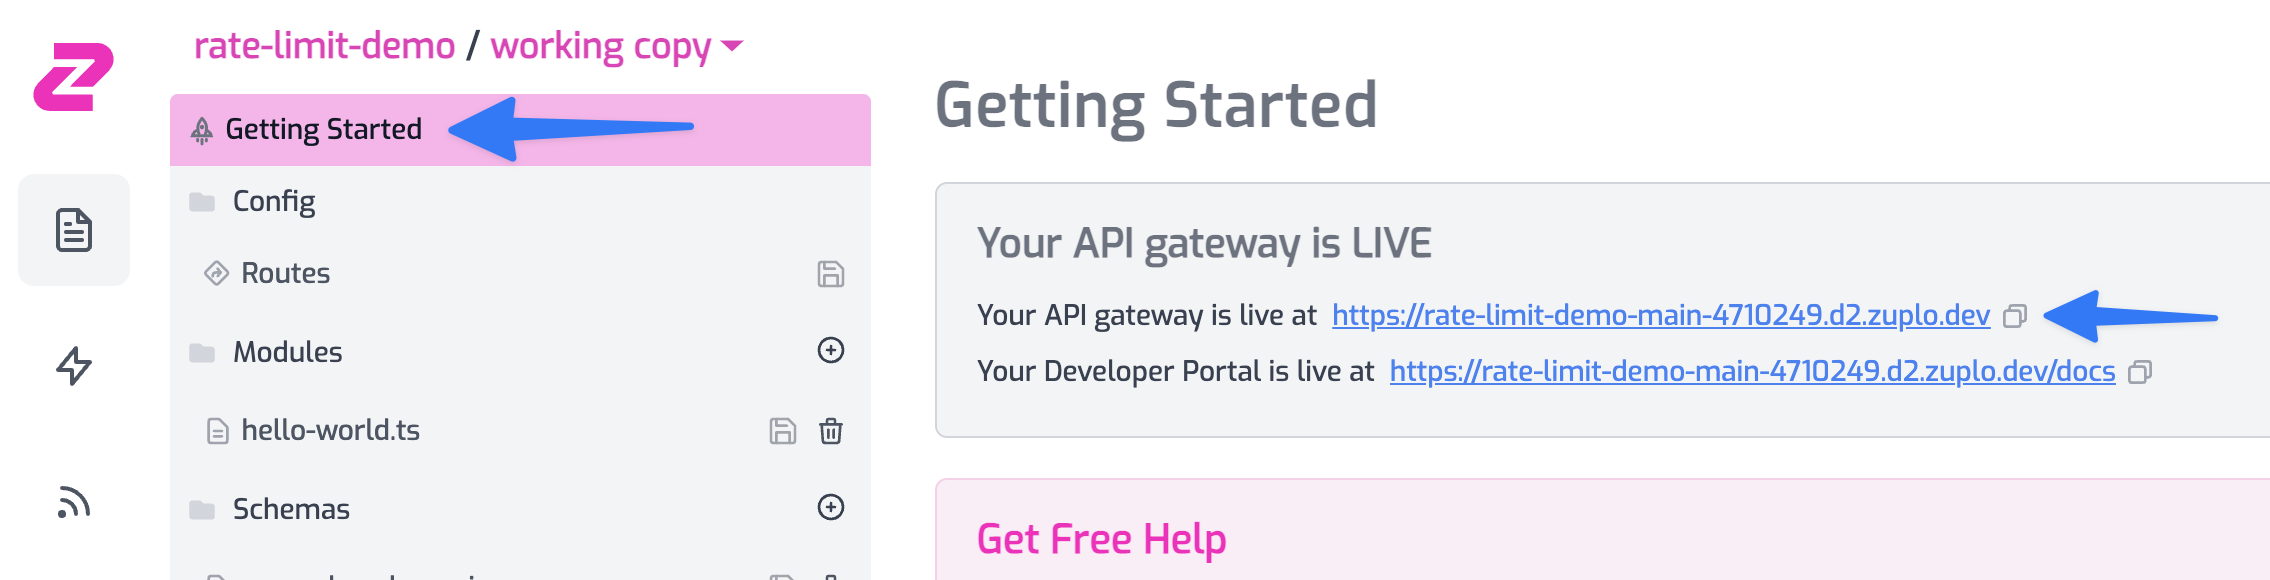
To get started we'll create a simple Zuplo gateway that removes the need to specify the API key.

Create a new project and add a route:

  • Summary: My OpenAI Completions
  • Path: /v1/my-completions
  • Method: POST
  • CORS: No CORS
  • Handler: URL Rewrite - https://api.openai.com/v1/completions

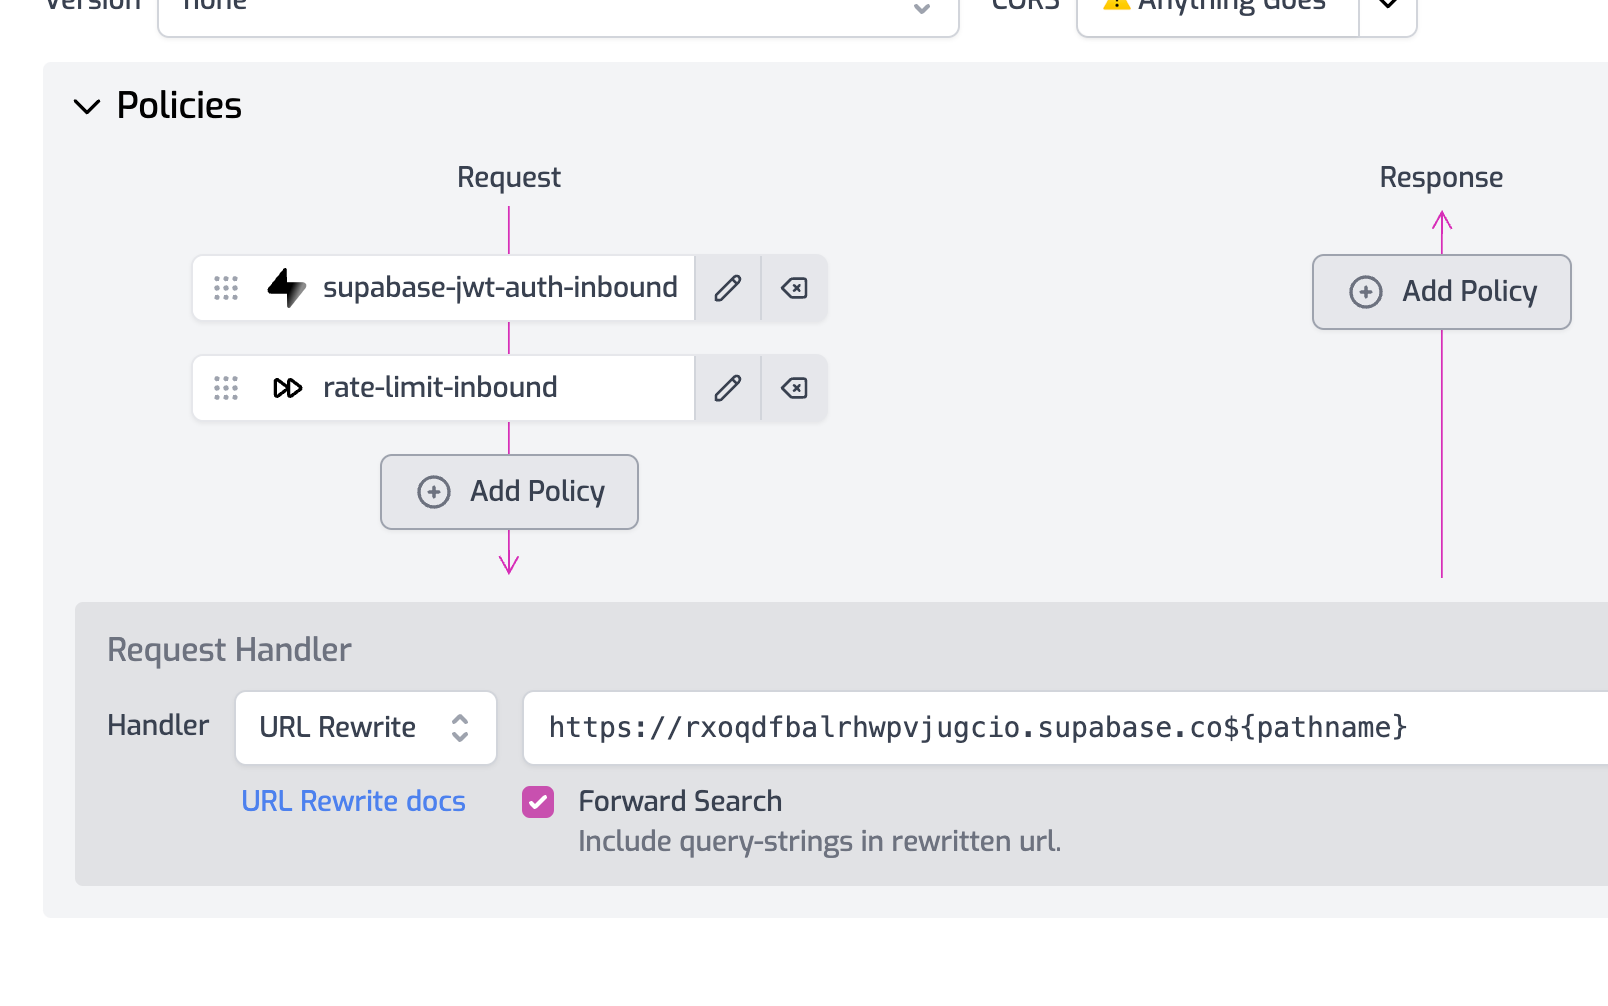
Next, we need to add a policy that will set the authorization header when calling OpenAI. Open the Policies section and click Add Policy.

Add or Set Request Headers

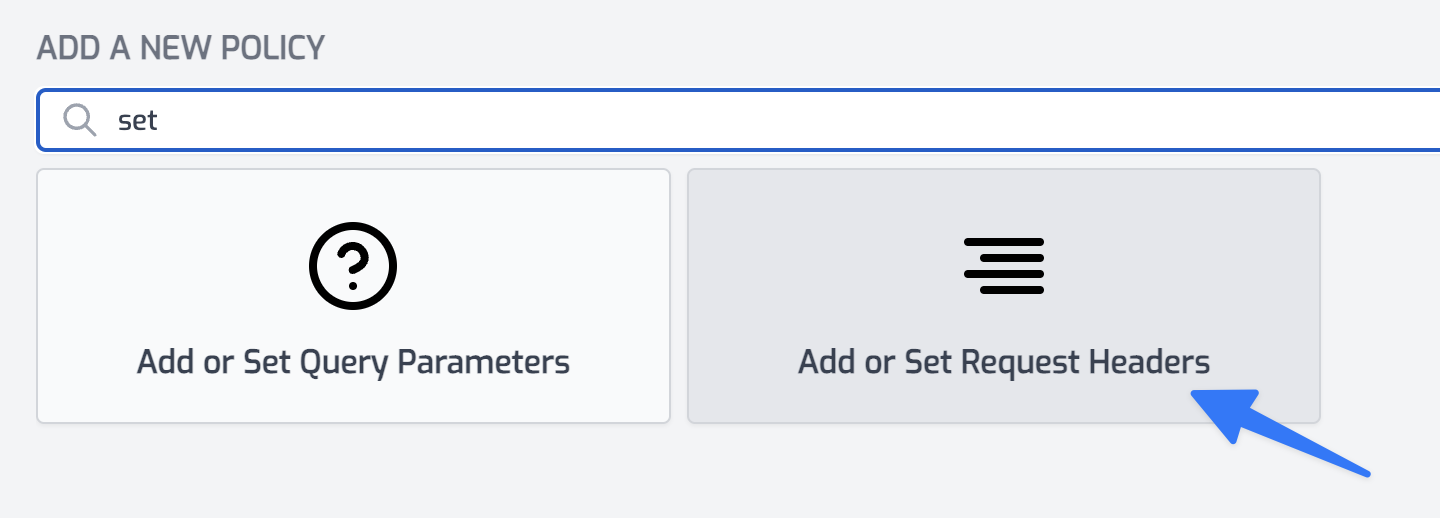
Choose the Add or Set Request Headers policy. Set the policy configuration as follows

{
"export": "SetHeadersInboundPolicy",
"module": "$import(@zuplo/runtime)",
"options": {
"headers": [
{
"name": "authorization",
"value": "Bearer $env(OPEN_AI_API_KEY)",
"overwrite": true
}
]
}
}

Note that we will read the API Key from a secure secret stored as an environment variable - go setup your OPEN_AI_API_KEY env var.

Save your changes, and we're ready.

Take the above curl command and remove the authorization header and change the URL to your project URL:

curl https://open-ai-main-298dc8d.d2.zuplo.dev/v1/my-completions \
-H 'Content-Type: application/json' \
-d '{
"model": "babbage",
"prompt": "Say this is a test",
"max_tokens": 7,
"temperature": 0
}'

Look no API key 👏 - but your request should work fine as Zuplo will add the key on the way out.

Securing Zuplo

You now have several choices to secure Zuplo.

  1. Require your users to login (with a service like Auth0) and then use an Auth0 JWT with Zuplo.
  2. Issue API Keys to all your users using Zuplo's API Key Service.
  3. Host anonymously but add additional safe guards, including requiring a specific Origin and strict CORS using custom CORS policies.

Make sure to add rate limiting - based on user or maybe IP (for anonymous use case).

Event Streaming (data-only server-sent events)

OpenAI supports event streaming, this is easy to get working with Zuplo and works out of the box. You can try this by adding a stream: true property to your POST to OpenAI:

curl https://open-ai-main-298dc8d.d2.zuplo.dev/v1/my-completions \
-H 'Content-Type: application/json' \
-d '{
"model": "babbage",
"prompt": "Say this is a test",
"max_tokens": 7,
"temperature": 0,
"stream": true
}'

However, what if you want to support EventSource in the browser? That is easy to accomplish with Zuplo also by taking the incoming GET request created by EventSource and translating it into a POST request, with the appropriate headers and body inside Zuplo.

tip

Event streaming doesn't work fully on 'working-copy' but works great on your 'edge deployments'. Read more about environments to promote to an edge deployment.

Create a new route:

  • Summary: My OpenAI Completions for Browser Event Source
  • Path: /v1/my-browser-completions
  • Method: GET
  • CORS: Anything Goes
  • Handler: URL Rewrite - https://api.openai.com/v1/completions

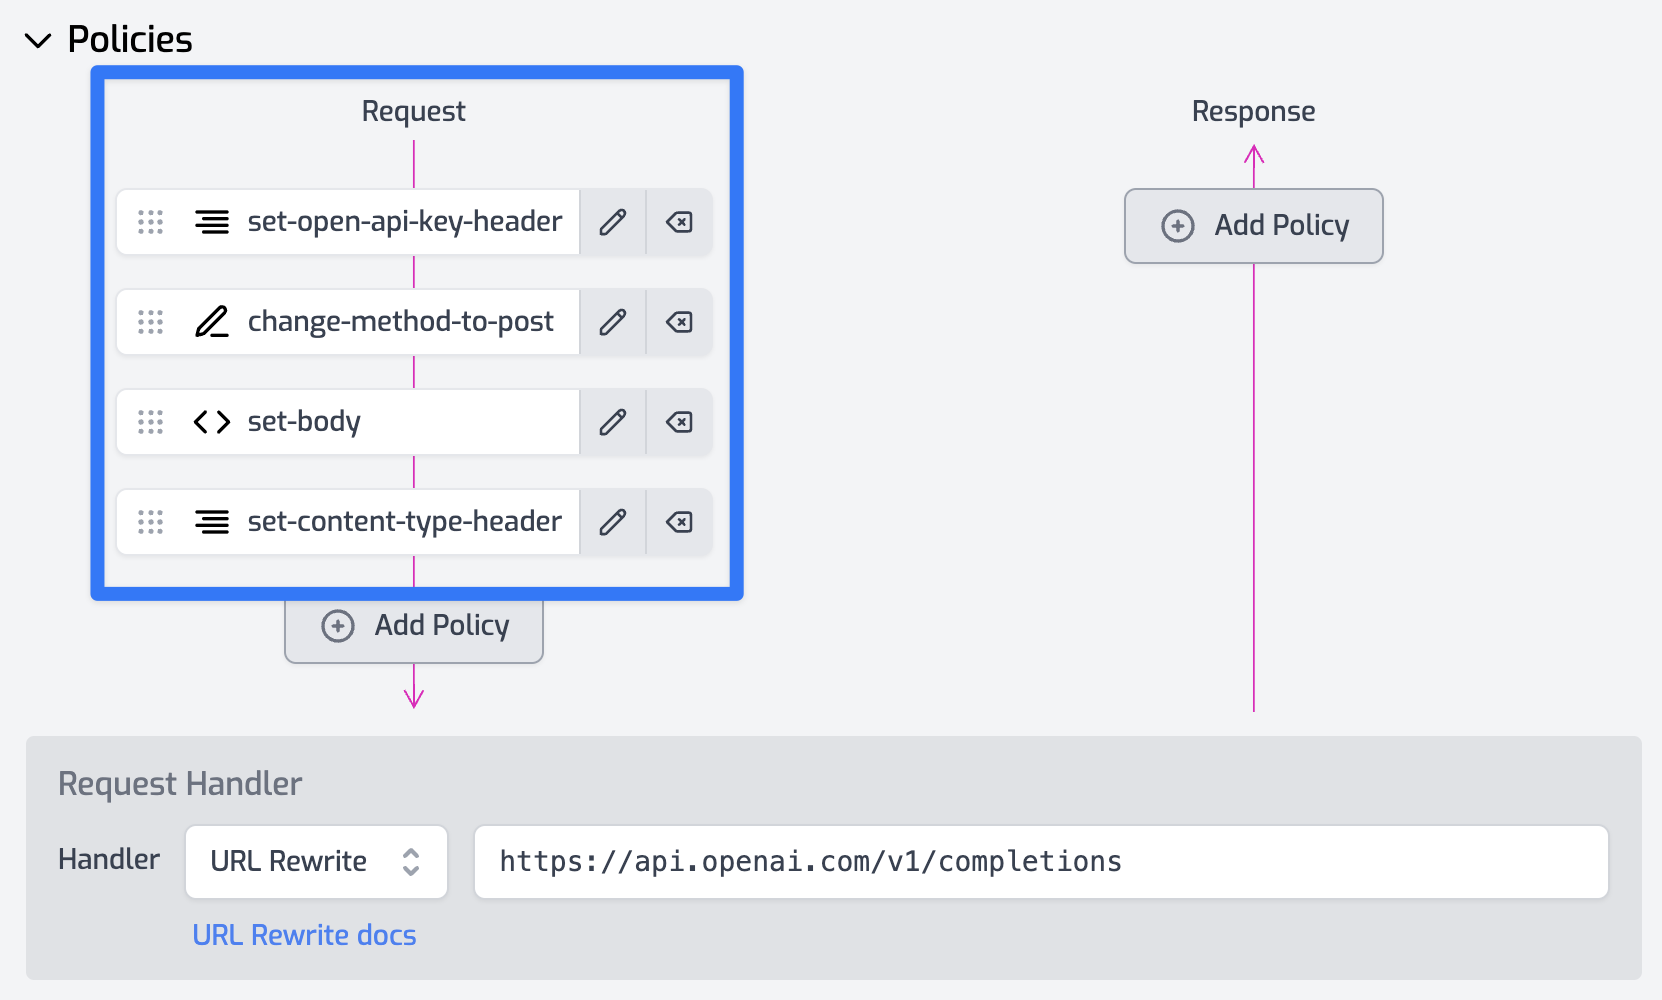
Add the following policies

  • Reuse your Set Header policy that sets the authorization key above.
  • Add a Change Method policy to update the request to be a POST
  • Add another Set Header policy to set the content-type header to application/json
  • Finally, add a Set Body policy with the following configuration.

Policies

{
"export": "SetBodyInboundPolicy",
"module": "$import(@zuplo/runtime)",
"options": {
"body": "{ \"model\": \"babbage\", \"prompt\": \"Say this is a test\", \"max_tokens\": 7, \"temperature\": 0, \"stream\": true }"
}
}

You can now use an EventSource in a browser and call Zuplo as follows

const evtSource = new EventSource(
"open-ai-main-298dc8d.d2.zuplo.dev/v1/my-browser-completions"
);

evtSource.onmessage = (evt) => {
if (evt.data === "[DONE]") {
console.log("end of event stream...");
return;
}
console.log(JSON.parse(evt.data));
};

You could also make the POST body dynamic, based on a querystring in the EventSource - you would then read the querystring values in a custom policy and set the body based on values in the querystring (you would no longer need the Set Body policy in this case).

The custom code (inbound policy) might look like this

import { ZuploContext, ZuploRequest } from "@zuplo/runtime";

export default async function (
request: ZuploRequest,
context: ZuploContext,
options: never,
policyName: string
) {
const prompt = request.query.prompt;

// perform any appropriate validation on `prompt` here

const data = {
model: "babbage",
prompt, // pass the query value in here
max_tokens: 7,
temperature: 0,
};

return new ZuploRequest(request, {
body: JSON.stringify(data),
});
}

· 2 min read
Josh Twist

We just published a new video showing how you can add smart routing, behind a single common API for multiple backends, in 1 page of TypeScript. Metadata is loaded from an external service (in this case, Xata but you could use Supabase, Mongo etc).

Here's the code used in the demonstration:

import {
ZuploContext,
ZuploRequest,
environment,
ZoneCache,
} from "@zuplo/runtime";

interface RouteInfo {
customerId: string;
primaryUrl: string;
secondaryUrl?: string;
}

const CACHE_KEY = "ROUTE_RECORDS";
const CACHE_NAME = "ROUTE_INFO";

async function loadRouteInfoFromApi(context: ZuploContext) {
const cache = new ZoneCache(CACHE_NAME, context);

const records = await cache.get(CACHE_KEY);

if (!records) {
const options = {
method: "POST",
headers: {
Authorization: `Bearer ${environment.XATA_API_KEY}`,
"Content-Type": "application/json",
},
body: '{"page":{"size":15}}',
};

const response = await fetch(
"https://YOUR-XATA-URL.xata.sh/db/test:main/tables/routing/query",
options
);

const data = await response.json();
cache.put(CACHE_KEY, data.records, 300); // 5 minutes

context.log.info("RouteInfo loaded from API");
return data.records;
}

context.log.info("RouteInfo loaded from Cache");
return records;
}

export default async function (request: ZuploRequest, context: ZuploContext) {
const customerId = request.user.data.customerId;

const routing = await loadRouteInfoFromApi(context);

const routeInfo = routing.find((r) => r.customerId === customerId);

if (!routeInfo) {
return new Response(`No route found for customer '${customerId}'`, {
status: 404,
});
}

const response = await fetch(routeInfo.primaryUrl);
if (response.status !== 200 && routeInfo.secondaryUrl) {
context.log.info(
`First request failed, trying secondary (${response.status})`
);
const response2 = await fetch(routeInfo.secondaryUrl);
return response2;
}

return response;
}

Got questions or feedback? Join us on Discord.

· 2 min read
Josh Twist

Your supabase backend is often exposed to the public, anybody can sign in create an account and work with data. This can be a problem, if you get a malicious or clumsy user that is hitting your service too hard. That's where you need rate-limits, a way of making sure a single user doesn't starve others of resources (or cost you too much $).

With Zuplo, you can add user-based rate-limiting to a supabase backend in a couple of minutes. There is a video tutorial version of this guide here: YouTube: Per-user rate limit your supabase backend.

Best of all, the only code you'll need to change in your client is the URL of the supabase service (because traffic will now go via Zuplo).

Here are the steps

1/ Create a new project in Zuplo (get a free account at portal.zuplo.com).

2/ Add a route to your new project. Set the following properties

  • path: /(.*) - this is wildcard route that will match all paths
  • methods: all - select all methods in the dropdown
  • CORS: anything goes - this is easiest, but you can set stricter policies
  • URL Rewrite: <https://your-supabase-domain>${pathname} - make sure to add your supabase URL, e.g. https://rxodffgalrhwpvjugcio.supabase.co${pathname}

3/ Add a policy to the request pipeline - choose the supabase-jwt-auth policy. Remove the required claims from the JSON template.

{
"export": "SupabaseJwtInboundPolicy",
"module": "$import(@zuplo/runtime)",
"options": {
"secret": "$env(SUPABASE_JWT_SECRET)",
"allowUnauthenticatedRequests": false
}
}

4/ Create an environment variable called SUPABASE_JWT_SECRET (this is in Settings > Environment Variables). Paste in the JWT Secret from supabase (available in Settings > API).

Environment Variable

5/ Add a rate-limiting policy at the end of the request pipeline. Configure it to be a user mode rate limit, suggest 2 requests per minute for demo purposes.

Rate Limit Policy

{
"export": "RateLimitInboundPolicy",
"module": "$import(@zuplo/runtime)",
"options": {
"rateLimitBy": "user",
"requestsAllowed": 2,
"timeWindowMinutes": 1
}
}

6/ Get the URL for your gateway by going to Getting Started tab and copying the gateway URL. Replace the Supabase URL in your client and boom 💥!

Getting Started

You now have a rate-limit protected supabase backend. Stay tuned for a subsequent tutorial where we'll show how to ensure folks have to come via Zuplo to call your Supabase backend.

Got questions or feedback, join us on Discord.

· 3 min read
Josh Twist

One of the most powerful aspects of Zuplo is the programmable extensibility. Recently somebody on our Discord channel asked if we supported query parameter validation as we do JSON Body validation.

We plan to add this soon as a built-in policy (which will use your OpenAPI specification). However, I spent 20 minutes building a custom policy to demonstrate how easy it would be to build a custom policy to support this while you wait.

Here's how you would configure the policy

{
"export": "default",
"module": "$import(./modules/query-param-validator)",
"options": {
"allowAdditionalParameters": false,
"params": [
{
"name": "foo",
"required": true,
"type": "int"
},
{
"name": "bar",
"required": true,
"type": "number"
},
{
"name": "wib",
"required": false,
"type": "string"
},
{
"name": "ble",
"required": true,
"type": "boolean"
}
]
}
}

This defines a policy for a route (which can be reused on other routes) that states there are four supported query parameters: foo, bar, wib and ble. No additional query parameters are allowed.

Note that foo, bar and ble are required, whereas wib is optional.

Each has a different type specified, and the request will be rejected if the data cannot be parsed as that type from the options int, number, string, and boolean.

Here are some hits on that URL and associated error responses (status code 400):

Path: /query

Bad Request

Required query parameter 'foo' missing
Required query parameter 'bar' missing
Required query parameter 'ble' missing

Path: /query?foo=&bar=hey&wib=nope&ble=23

Bad Request

Required query parameter 'foo' missing
Invalid value for query parameter 'bar': 'hey' is not a valid number
Invalid value for query parameter 'ble': '23' not a valid boolean value (expect 'true' or false')

Easy peasy - here's the code for that custom policy

import { ZuploContext, ZuploRequest } from "@zuplo/runtime";

type SupportedTyped = "int" | "number" | "string" | "boolean";

type ParameterValidationRule = {
name: string;
required?: boolean;
type?: SupportedTyped;
};

type QueryParamValidatorOptions = {
params: ParameterValidationRule[];
allowAdditionalParameters?: boolean;
};

const typeValidators: Record<
SupportedTyped,
(value: string) => string | undefined
> = {
int: (value: string) => {
const int = parseFloat(value);
if (!Number.isInteger(int)) {
return `'${value}' is not a valid integer`;
}
},
number: (value: string) => {
const float = parseFloat(value);
if (Number.isNaN(float)) {
return `'${value}' is not a valid number`;
}
},
string: (value: string) => {
if (value.length === 0) {
return `empty string provided`;
}
},
boolean: (value: string) => {
if (!["true", "false"].includes(value)) {
return `'${value}' not a valid boolean value (expect 'true' or false')`;
}
},
};

export default async function (
request: ZuploRequest,
context: ZuploContext,
options: QueryParamValidatorOptions,
policyName: string
) {
const allowAdditionalParameters = options.allowAdditionalParameters ?? false;
const q = request.query;
const errors: string[] = [];

// 1. check no additional parameters
if (!allowAdditionalParameters) {
const allowedNames = options.params.map((p) => p.name);

for (const queryName of Object.keys(q)) {
if (!allowedNames.includes(queryName)) {
errors.push(`Additional query parameter '${queryName}' not allowed`);
}
}
}

// 2. check required and value types
for (const param of options.params) {
const value = q[param.name];
const required = param.required ?? true;
if (!value) {
if (!required) {
continue;
}
// required parameter not provided.
errors.push(`Required query parameter '${param.name}' missing`);
}

if (param.type && value) {
const validatorResult = typeValidators[param.type](value);
if (validatorResult) {
errors.push(
`Invalid value for query parameter '${param.name}': ${validatorResult}`
);
}
}
}

if (errors.length > 0) {
return new Response(`Bad Request\n\n${errors.join("\n")}`, { status: 400 });
}

return request;
}

Have fun!

· One min read
Josh Twist

We've recently been playing with Supabase a lot and showing how Zuplo can help you take your Supabase backend and go "API-first".

Often times, this requires you to have a JWT token from Supabase for testing. Since we're very focused on the API and backend of your infrastructure I got tired of creating test websites to login to Supabase and get myself a valid JWT. For that reason, we created a free online tool to help you get a JWT token from supabase for testing.

It's easy to use and the instructions are on the homepage. Also, check out this short video for a quick guide:

It's open source too - contribute on github